I always try to eat delicious food. Unfortunately I don't have that much money, so I have to cook a lot of it at home. But thats OK because I love cooking and I love eating at home with my wife. This is a website with my favorite recipes and a little bit of commentary.

Sunday, April 29, 2007

Cuban Pork Roast

Its getting to be grilling weather. I fired up the grill and made some Cuban Pork Roast today. It was tasty and it of course means that I will be having Cuban Sandwiches tomorrow!

Also shown are horseradish and hotsauce. It is illegal to serve any kind of a pork product without horseradish.

Bagels

One of my favorite memories of the last decade was when I helped Easy E move to New York. We started in Iowa City and took a cross country trip to NYC. Easy and I were in his Dodge Diplomat pulling a U-Haul trailer. We were following his folks who were driving a big assed motorhome. At the time they were really into country music so I made a CD for them on my computer called "Big Assed Belt Buckles." It had old school country music like Mickey Gille, Waylon Jennings, Willie Nelson, Dolly Parton and my favorite guitarist - Jerry Reed.
You may recognize him from a certain movie starring this car:
I had the MOST fun on that trip. I was the passenger most of the time so I hung my right arm out the window and got an abominable sun burn on that arm. At night we stayed in campgrounds. One of my favorite activities in life is camping in State parks. You can stay for $7 a night almost anywhere in the country. I've travelled all over the country staying in State parks. Anyway astute readers may remember Eric's Mom's Beans. I had those for the first time on that trip.

Please allow me a few quick stories from that trip. When we finally got to NYC we parked the motorhome in a trailer park in New Jersey. You could see the World Trade Center from where were parked. Then we took the drove the Diplomat with trailer into the city and moved in E's stuff. He was on the 3rd floor. E's mom and dad got overheated and almost died I think. If it weren't for this miracle device which was some sort of a magic cooling bandanna I would have died for sure. After moving in we left E in the apartment to unpack and we set about the task of driving the Diplomat and Trailer back to New Jersey. When we got out to the curb we all sort of stopped and looked at each other. I looked at E's mom and dad and said "if you want to survive the trip back to New Jersey, let me drive." There was no argument. At the time I was living in Chicago and was used to driving in traffic. I took us down a highway on the east side of the island. I heard curse words in every language and I am sure E's parents were shocked when I responded in kind. When we got back to the trailer there was a tremendous sense of relief.

Now for the other story and the reason for the post. In the mornings while we were in NYC I took the train up about mid Central Park. Because E was in orientation I had some time to kill. I would stop at a bagel shop and get a bagel with cream cheese. I would take a copy of the New York Times and the bagel with some coffee to Central Park and enjoy the morning. Ever since then I have loved good bagels and there is no other newspaper than the New York Times. The problem is it is very difficult to get good bagels outside of NYC. Good bagels are about 10 minutes out of the oven and have a semi crispy and chewy crust with a chewy bready dough. If you haven't had a bagel in NYC then you don't know what I am talking about.

I got this recipe from my favorite bread book the Bread Baker's Apprentice. It pretty much nails the whole bagel thing.

Bagels

Makes 6 bagels

pre-dough

1/2 t instant yeast
2 cups (9 oz) bread flour
1 1/4 cups (10 oz) water

Combine pre-dough ingredients in a mixer and mix real well. Cover bowl with plastic wrap and let sit at room temperature for a few hours, until it is bubbly.

Dough

1/2 t instant yeast
1 1/3 cups flour (8.5 ounces)
1 1/3 t salt
1/2 T barley malt syrup or honey

To make the dough add the dough ingredients to the pre-dough ingredients and kneed using the dough hook for 6-7 minutes. Dough should not be tacky or sticky. If it sticks to your hands add a little more flour.

Divide the dough into 6 equal sized balls - about 4.5 ounces each. Place the dough balls onto a piece of parchment paper lining a baking sheet. Let rest 20 minutes. Form into a bagel by poking a hole in the center of the dough ball and working it into a bagel shape. Place back onto the parchment lined baking sheet. Mist the bagels with spray oil and cover with plastic wrap. Place into the fridge overnight.

In the morning preheat the oven to 500 degrees with the rack in the middle. Bring a large pot of water to a boil and add 1 T baking soda to the water. Drop in the bagels and cook for one minute. Turn the bagels over and bake for a minute more.

Place back onto the parchment lined baking sheet and slide into the oven. After 5 minutes of baking rotate the pan 180 degrees. Lower the temp to 450 and bake 5 more minutes or until they are of the desired brown-ness. Let cool 10 minutes and serve.
Oh yeah, thats what I'm talking about!

Saturday, April 28, 2007

A little ride through the area

I went on a little ride through southern Indiana. I took a road called the Corydon Pike to a small town called Corydon. It was a ridiculously windy and hilly road.
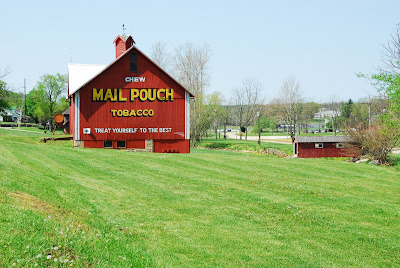
About halfway to Corydon I spotted an interesting advertisement.
After Corydon I went south and crossed the Ohio river.

Calzones!

I never had a calzone growing up in Iowa. It wasn't until I was in medical school in Chicago that I laid into a calzone. The one that I had in Chicago wasn't all that great. It was oven baked and dry and they didn't serve it with any sauce. It was what my wife's old students would have called a "choke." A choke was a sandwich served as school lunch with no sauce of any kind.

I did a little research into calzones and saw something that might be interesting - a fried calzone! What could be tastier and more appropriate to the Midwest than a deep fat fried pizza?

Calzones

Makes 2 calzones

1 3/4 Cups Flour (202 g)
A little over 1/2 cup Water (127 g)
1/2 t Salt
1/2 t olive oil
1/2 package instant yeast

Combine all ingredients in a mixer and kneed using the dough hook for 6 minutes on medium speed. Cover the bowl with plastic wrap and let rise until double in size.

When dough has doubled in size, heat a frying pan over medium heat with about 1/4-1/2 inch oil in the bottom. Divide dough into two balls. Flatten into round pizza shapes, about 12 inches a piece. Spread some toppings on 1/2 of the pizza. I used pizza sauce, sausage and mozarella tonight. When all the toppings are on fold the pizza over on itself, forming a pocket. Press the edges to seal. Use a fork to mash the edge to make a neat little design (see photo below).

Fry in the oil, turning once. Make sure to not let it get overdone. Let cool 5 minutes before eating. Serve with a little side of marinara.
So tasty, so pizza-y, so deep fat fried!

Monday, April 23, 2007

Gino's East Pizza

Its been a while since I made some Gino's. I've made a few changes in how I do things since the last time I posted about Gino's. Here is the current way I am making it. I am no longer trying to duplicate Gino's exactly, I am trying to personalize it to my tastes.

My Gino's Pizza
Makes a 13 inch deep dish pizza

Combine 3/4 cup warm water with 1/2 package yeast. Stir and let the mixture sit until it is foamy. then add:

a few drops of yellow food coloring
1/2 cup corn oil
2 T olive oil
2 t salt (sea salt preferred)
4 cups (16 ounces) of all purpose flour

Stir the ingredients up with a spoon until just combined. You may need to add a little more water if the dough is too hard. Set a timer for 2 minutes. Kneed the dough by hand for exactly 2 minutes. Once this is done, place the dough in an oiled bowl and cover with plastic wrap. Place in the fridge overnight. The next morning before you go to work put it out on the counter. It will slowly rise all day. 8-10 hours is ok or even 12. When you get home preheat the oven to 450 with the rack on the lowest rung. On a rung 2 racks above place your pizza stone.

Assembling pizza

Take a 16 ounce block of mozzarella cheese and cut it into slices. Cut a small ball of fresh mozarella into slices as well. Next take a large can of crushed tomatoes and add a little salt. I prefer 6 in 1 brand tomatoes.

Roll your dough out until it is 1/8th to 1/4 inch thick. Take your dough and push it into the bottom of the pan, drawing it out with your hands until flat and riding up the sides by 1 and 1/2 inch. If there is excess dough you can trim it and throw out the excess. You want the dough to be only about 1/8th to 1/4 inch thick. Lift up the crust in a few areas and pour a little olive oil in underneath the crust. Some of the oil from the bottom will inevitably spill onto the top of the dough. That is just fine. Next place the slices of mozzarella in the bottom of the dough. Next place the fresh mozarella slices. Next put some pepperoni down over the cheese. Next put a little bit of cooked italian sausage over the pepperoni. Finally put a layer of sauce over the top of everything, and sprinkle with parmesan and oregano. Immediately put the pizza in the oven on the bottom rack. Cook for 15 minutes and turn. Depending on your oven you will need to cook and additional 10 to 15 minutes until done. I know mine is done when the cheese bubbles up and starts to brown. The crust will be nice and golden brown as well. At this point I turn the broiler on and put the pizza up on the next rack. I broil it for about 1 or 2 minutes until the crust browns a little more and the sauce darkens in a couple spots. Let sit for 7-10 minutes before slicing.
Here is a slice of the good stuff.
The bottom is done to my liking.
Even the baby loves Gino's!

Labels:

Saturday, April 21, 2007

Lentil Soup

I was at a restaurant the other day and had a delicious bowl of lentil soup. After carefully examining the ingredients in the bowl I came up with this recipe for Arabian Lentil Soup.

Lentil Soup

1 cup brown lentils
4 cups chicken broth
1 carrot, grated
1 stalk celery, sliced
a few handfuls of baby spinach either frozen or fresh
1/2 onion, diced
2 ounces canned pimentos
olive oil
2 cloves garlic, minced
1 bay leaf
1/2 t thyme
1 t oregano
1 t cumin
1/2 t coriander
salt and pepper to taste

Heat a pot over medium heat. Add olive oil. Saute onion until translucent. Add garlic, celery and pimentos and saute for a couple more minutes. Add grated carrot and everything else except the spinach. Bring to a boil, cover and reduce heat. Simmer 1/2 hour or until lentils are tender and well cooked. Remove the lid and cook uncovered until the soup thickens up a bit - about like the consistency of good chili. At the end of cooking add the spinach and stir. Cook for a couple minutes until the spinach wilts. Remove from heat and serve.

Kaiser Rolls


Nothing says lovin' like homemade Kaiser rolls for your hamburger. There really is no comparison between a burger on a homemade bun and one on a storebought bun.

Kaiser Rolls

pre-ferment:

1 cup (5 ounces) bread flour
1/4 t salt
1/2 package instant yeast
about 3/4 cup water (4 ounces)

Combine everything in a mixer and stir until very well combined. Cover with plastic wrap and let rise on the counter until bubbly and rising well. Place in the fridge overnight.

The next day:
Remove pre-ferment from the fridge 1 hour before you are ready to use. To the pre-ferment add:
2 1/4 cups (10 ounces) bread flour
3/4 t salt
1 t barley malt syrup (can substitute honey)
1/2 package instant yeast
1 large egg
1 1/2 T vegetable oil
about 3/4 cup warm water

Kneed for 10 minutes in the mixer. Cover the mixer bowl with plastic wrap. Let rise until doubled in size. Remove dough from the bowl and separate into 6 pieces. Form each roll into a Kaiser roll(see below). Place the buns cut on a parchment lined baking sheet. Mist with spray oil and cover with plastic wrap. Let rise 45 minutes or until doubled in size.
Preheat oven to 425 with the rack on the middle shelf. Mist the rolls with a little water and sprinkle with poppy seeds or sesame seeds. Bake for 10 minutes. Rotate 180 degrees and lower oven temperature to 400. Continue baking until browned - about 10-15 minutes. Let cool at least 30 minutes before serving.

Shaping a Kaiser Roll
Roll each piece of dough into an 8 inch long strand.

Tie a simple knot.

Loop the 2 ends through the ring a second time. One end should come through at 7 o'clock and the other should come through at 5 o'clock.


Here is a photo of Barley Syrup:

Spicy Ranch Burgers

Here is a nice variation to the common burger. Sometimes you just want your burger a little different.

Spicy Ranch Sauce
1 cup ranch dressing
1 chipotle pepper with a little of the sauce from the can, very finely diced

Mix everything up.

To make a spicy ranch burger, saute some sliced onions and grill up some cheeseburgers. Put the onions on top of the bottom half of the bun followed by the cheeseburger. Top with Spicy Ranch Sauce and sliced jalapenos (if you like).

Banana Pudding

When I first moved to Kentucky I took a road trip with one of my professors to Whittaker's Guns in Owensboro. It is a huge gunstore with very cheap prices. I didn't buy anything but I was amazed at the selection - certainly the most guns I have ever seen in one place at one time along with a healthy selection of knives.

After the store we went to a famous bar-b-que in Owensboro called Moonlite bar-b-que. It is a huge family restaurant that has a bar-b-que buffet, served trough style. They have all kinds of different smoked meat and like 100 different side dishes. The smoked meat was less than impressive except for the goat. I'll get to that in a minute. The sides were incredible and too numerous to count. The best thing in the whole restaurant is the banana pudding. They have a cookbook for sale at the restaurant but the recipe for banana pudding in it is incorrect. It kindof makes banana pudding but they added way too much corn starch. I modified their recipe to make a workable recipe.

As for the smoked goat it is actually mutton. A big thing in Kentucky is bar-b-qued mutton. It is such a huge tradition that politicians are separated into groups of mutton-eaters and non-eaters. I think it is mostly done in large batches at church bar-b-ques and political rallies. Moonlite is particularly famous for their mutton. I like it better to say it is goat. People get a funny look on their face when you talk about bar-b-qued goat. At any rate I really liked the smoked mutton. I can't say I would put it in my smoker but I'll eat it if its put in front of me.

Banana Pudding from Moonlite Bar-B-Que

2 bananas
graham crackers
3 cups milk
6 egg yolks
1 cup sugar
1 T butter
1 t vanilla
1/2 t salt
2 T corn starch

Meringue
6 egg whites
1/4 t cream of tartar
5 T sugar

Preheat your oven to 375. To a saucepan add sugar, egg yolks, milk, salt and corn starch. Heat over medium heat stirring constantly until it comes to a boil and thickens to pudding consistency. Remove from heat and stir in butter and vanilla.

Lay graham crackers on the bottom of a baking dish. Top with sliced bananas. Put on another layer of crackers. It should look like this:
Pour the pudding over everything. To make the meringue, beat everything with a mixer until it is very stiff like a meringue. Spread it over the top of the pudding. Bake in the oven until it is brown like this:
Put it in the fridge to cool.

Grilled Guido and a Message from Easy E

A very healthy and quick meal choice that we have a lot is the combination of soup, salad and sandwich. If we have leftover soup we eat that, otherwise it is some flavor of Campbell's. The baby likes bean and bacon, which is fortunate because so does her dad. If you get tired of the same old sandwiches and have some leftover italian type meats in the fridge you can make a grilled Guido.

Grilled Guido

2 slices white bread
3 slices salami
6 slices pepperoni
3 slices of tomato
seasoned salt
dried oregano
2 slices provolone cheese

Butter one side of each piece of bread so that the buttered side is on the outside. Place a piece of cheese, then three slices of salami, then six slices pepperoni, then the tomatoes. Season with seasoned salt and oregano as shown below.

Add another slice of cheese and the other piece of bread and grill it like a grilled cheese. If you have a panini maker then its even better.

And now for a message from my friend Easy E (not the dead rapper)

If you are making a grilled Guido for me, please slice it on the diagonal as in photo 1 below. Do not slice it straight across as in photo 2 below. Thank you.

Photo 1 - sliced on the diagnoal. Correct.


Photo 2 - Sliced straight across. Incorrect.

Wednesday, April 18, 2007

Pasta e Fagioli

When I was researching minestrone soup for the post last week I came across an article that claimed that the Roman army marched on minestrone and pasta e fagioli A.K.A. pasta with beans. It makes sense to me. When I was in college I took a lot of courses in anthropology. I didn't necessarily buy into the political crap that the professors liked to talk about, but I learned a lot about life in general from those courses. I even considered majoring in it for a time. In fact, I took enough classes in it to be just a few semester hours away from a minor. One of the things I learned is that most of the world lives on a diet of complementary proteins. To quote one of my professors "2/3 of the world's population lives on rice and beans." If you do a little research you will figure out that he isn't far off. Nutritionally a starch plus a protein is a good idea. Consider the modern American working-class diet: meat and potatoes. Although I very rarely eat that kind of food, I can see the logic. It is easy to prepare using cheap and readily available ingredients. For most of the world, however, meat protein is too expensive. Beans and corn are excellent substitutes.

Pasta e fagioli seems like an easily prepared dish from readily available ingredients. The version I made is a wee more complicated than what is probably available in most of the world but cut to its bare essentials would be a pretty decent nutritional dish. I have heard that it is a staple of the modern Italian diet. If I were in charge of the Roman army I would really like the idea of pasta and beans. My troops would get plenty of energy from the carbohydrates and they would have protein and vitamins from the beans. If I pillaged a village I might find a few chickens to add to the pot and maybe even a few vegetables. My troops would likely appreciate a little nugget of meat every now and again. Who knows. If I was lucky I might be able to add a critter or varmint to the pot. Unfortunately a big hole gets blown in my theory when you consider that pasta was relatively expensive in ancient Rome. Wheat flour and its products were relatively rare and expensive in olden times and were likely available only to the upper class.

Since I was much intrigued and I had leftover beans from the soup as well as leftover pasta I decided to do a little more research. I found a video on pasta e fagioli which was interesting. I also looked through some of my books and found a great recipe in Rao's Cookbook. I decided to make a version using the stuff I had on hand, based a little bit on each source.

Pasta e Fagioli (pasta with beans)

4 strips bacon
olive oil
1/2 onion, diced
1 whole clove of garlic, peeled but not otherwise molested
1/2 can cannellini beans with juice (you can substitute Great Northern beans or another white bean)
1/2 can fava beans with juice (you can substitute kidney beans or similar)

1 cup canned whole peeled tomatoes, drained of juice and crushed
salt and pepper
8 ounces tubetti pasta (you can substitute macaroni)

2 cups chicken broth
Parmesan or Romano cheese to top

Instructions:
Put olive oil in a Dutch oven and heat to medium heat. Add in strips of bacon and brown. Remove the bacon and leave the grease. Saute the onion and garlic until translucent. Crumble the bacon and return to the pan along with beans and juice, tomatoes, and chicken broth. Bring to a boil and reduce heat. Cover and simmer for 15 minutes. Taste the liquid and salt and pepper it to taste. Meanwhile cook the pasta until just about done. It should still be a little crisp and seem just a bit underdone. Drain and add pasta to the bean mixture. Cover and cook about 5 more minutes or until pasta is done. Serve topped with a little Parmesan or Romano cheese.

So tasty, so nutritious, so naughty. Pasta e Fagioli!

In other news, the wife is refining a recipe for a classic Italian American chicken dish. At this time I can't divulge any details of the recipe except for this photo of the first attempt at the dish:

Sunday, April 15, 2007

Minestrone Soup

Its still soup weather down here so we decided to have some minestrone soup. I found an excellent article on the history of minestrone soup. What it boils down to is that minestrone soup is a soup made from whatever vegies are in season at the time. Minestrone originally was a very humble dish and was intended for everyday consumption, being filling and cheap, and would likely have been the main course of a meal. Minestrone is part of what is known in Italy as cucina povera (literally "poor kitchen") meaning poorer people's cuisine.

Because different vegies come into season at different times of the year there is no set recipe. It depends on where you live and what season you are in. I took some inspiration from a recipe in Rao's Cookbook. I've featured quite a few other dishes from the book. They are all good and this soup is no exception.

Minestrone Soup

1/2 cup olive oil
1 cup fresh or frozen green peas
1 cup chopped onions
4 roma tomatoes, chopped
1 cup chopped leeks
1 quart chicken broth
1/4 cup minced Italian Parsley
Salt and pepper to taste
1 t thyme
1 to 2 cups cooked Cannellini (white kidney) beans
2 cups peeled and diced potatoes
2 T chopped fresh basil
2 cups diced carrots
1 cup diced celery
1 cup diced zucchini
1 cup fava beans, cooked
1/4 cup Pecorino Romano cheese, grated
1/4 cup small pasta of some sort

Brown a few strips of bacon, leaving some of the grease behind in the bottom of a saucepan. Remove, cool, and crumble. Add oil to the pot along with onions, leeks, parsley and thyme. Saute until they start to soften.

Return crumbled bacon to the pot. Add in remaining ingredients except cheese, basil and pasta. Bring to a boil, reduce heat, cover and simmer until all vegies are soft. Mash some of the beans against the side of the pot with a spoon. Add in the pasta and cook until pasta is soft. Remove from heat. Stir in basil. Serve with Romano cheese.

Ciabatta Bread

In search of a good bread to make Cuban Sandwiches? I like Ciabatta bread. The only problem is unless you live in a major city it will be difficult to get. I love making bread. Its really easy once you get the hang of it. I got this recipe from the ultimate bread book - The Bread Baker's Apprentice.

Ciabatta

Making the Poolish:


Combine 2 1/2 cups bread flour (11.25 ounces) with 1 1/2 cups water (12 ounces) and 1/4 teaspoon instant yeast. It should be about as thick as pancake batter. Cover with plastic wrap and let rise on the counter for 3 to 4 hours. Refrigerate overnight.

Making the dough:

Remove the poolish from the fridge 1 hour before you want to use it. Combine 3 cups (13.5 ounces) bread flour with 1 3/4 t salt and 1 1/2 t instant yeast. Add in the poolish and 6 T water. Mix on medium speed for about 9 minutes. The dough should clear the sides of the bowl but stick to the bottom. You may need to add a little more flour or water, depending. Cover the bowl with plastic wrap and let rest for 30 minutes. After 30 minutes, stretch the dough out into a rectangle and fold it up like a letter. Put it back in the bowl and cover with plastic wrap. Allow the dough to ferment for 1 1/2 to 2 hours.

Shaping into loaves:

This is where it gets a little more complicated. If you can get a couche, you probably should. You can get one by clicking this link. If you can't get one, improvise.

Dust top of the dough with flour and pat into a rectangle. Wait 2 minutes.

Stretch the dough to twice its length and fold the dough over on itself like a letter.

Devide the dough into 2 or 3 pieces being careful not to squeeze the bubbles out of the dough. Form each piece into a rectangle and bunch the cloth up between the pieces to provide a wall.

Spray the top of the dough with spray oil, cover with a cloth and let rise again for 45 to 60 minutes.

Preparing the oven:

Preheat the oven to 500 with a baking stone on the middle rack. On a rack below the baking stone put a big cast iron skillet.

Baking the bread:

Gently transfer the dough to a well floured pizza peel. Place directly on the baking stone and dump 1 cup ice into the cast iron skillet on the lower rack. Mist the sides of the oven with water every 30 seconds for three mistings. Lower the oven temperature to 450 and bake 10 minutes. Rotate the loves 180 degrees and bake for 5 to 10 more minutes until they are done.

Trick:
To make sure that the ends are nice and square like the photo above, just before placing in the oven slice the ends off. You can use the ends to make naughty little breadlet sticks like these:
Booyaah!

Cold Kentucky Rain

In light of the recent cold Kentucky rain, I decided to make something from an Elvis cookbook. I am a big fan of breakfast food but I just don't like eating breakfast. I decided to whip up some corned beef hash. I didn't have any corned beef handy so I used a slice of country ham instead.

Corned Beef, Potato and Pepper Hash a la Elvis

1 t salt
1 pound potatoes, peeled and cut into 1/2 inch cubes
2 T butter
1 medium onion, diced
1 cup diced red or green bell pepper
12 oz cooked corned beef, cut into 1/2 inch cubes
3 T chopped parsley
1/4 cup half and half
3 T white wine
1/2 t dry mustard
black pepper to taste

Boil the potatoes for 7 minutes or until soft. Drain and set aside.
Melt 1 T butter in a cast iron skillet over medium heat. Add onion and bell pepper and cook until tender. Dump everything together in a bowl and stir well. Reheat the frying pan over medium heat. Add the remaining butter. Add the hash mixture and press it down firmly. Cook hash for 15 minutes or until it is well browned, turning it once with a spatula.

Ledyard Country Store

The Ledyard Country Store is having the Spring Shower Saving! I got a flier in the mail from our man in the field. Particular items of interest:

Our own homemade chili available this week in the meat case!
Shur Fresh 12 oz cooked ham ..... $3.69
Yellow medium yellow onions .......$1.19 LB
Vine ripened tomatoes ...................$1.55 LB
Shur fine Navy beans ......................69 cents

Can anyone say bean soup in Ledyard? You'd best hurry in fast to get these kinds of prices. The flier is dated 4/11/07 and its already the 15th people.

In other Ledyard News, the Ledyard Easter egg hunt featured the hiding of - get this - 666 eggs. That translates to 55 and a half dozen eggs. I guess the other 6 were dropped. If I was involved in the hiding of the eggs, those six would have been eaten on the sly, either as Deviled eggs or with salt and pepper, depending on the time available.

In light of the wildly successful Ledyard Easter Egg Hunt, I decided to make up some deviled eggs. I found an interesting site with the history of deviled eggs.

Here is how I would have used the six missing eggs from the Ledyard Easter Egg Hunt:

Deviled Eggs a La Ledyard

6 hard boiled eggs
Mayo
Mustard
a dash of hot sauce
a few green olives with pimentos, finely diced
paprika

Peel the eggs and slice in half lengthwise. Remove the yolks to a bowl. Add a dallop of Mayo and a squirt of mustard. Mash together. Add more mayo as needed to get the consistancy of a deviled egg. Next add a dash of hot sauce and a few very finely diced green olives with pimento. Spoon the mixture back into the eggs. Sprinkle with paprika and serve.
Also featured in the photo are little spicy red peppers stuffed with feta cheese and mozarella cheese wrapped up in proscuito. MMMM!!

Saturday, April 14, 2007

Holy Machine Guns Batman!

Today your author braved the rain and some serious rednecks to report on a Kentucky phenomenon - the Knob Creek Machine Gun Shoot. Most of my readers will have no idea that they can purchase and shoot a fully automatic machine gun, let alone that the largest machine gun shoot happens not 30 minutes from where I am living right now. Twice a year people from all over the country make their way to a firing range just outside of Louisville called Knob Creek. If you can ever make it down I would highly recommend it, although not for the faint of heart.

It was cold and rainy today but that didn't stop thousands of people from hitting the range.
I had to park on the highway about a mile and a half away and walk in under an umbrella. I could have driven to a lot a little closer but it was muddy and all kinds of people were getting comically stuck.

Before I get to the meat of the post let me state that I grew up shooting guns and toting knives. What I saw today was truly far beyond my experience. Here is the first thing I encountered walking into the range:
Yes readers, that is a FLAMETHROWER RENTAL STAND!!!!!!!
I know that a lot of my readers are saying, yeah right, the guy is full of crap. There is no such thing. Thankfully, your author was carrying a high quality camera with a telephoto lens.
A few of you skeptics are probably saying 'yeah right. I've heard it all before, you can rent the flamethrower but you can't shoot it.' Please observe:
HE IS USING THE FLAMETHROWER ON A CAR!!!!!
Here are some more action shots:
You think thats crazy? How about the fact that the security guards were using the flamethrower to dry off from the rain.
Oh My Gawd!

Some of my readers may remember when I first started hiking in Kentucky. At the time I was very careful when hiking. I did not want to fall victim to any Deliverance type behavior. You remember? "He's got a real purdy mouth on him don't he?"
I figured I would be safe with a cell-phone and a Buck knife, but after learning that Hillbillies can actually be FIREPROOF, I started looking for a bigger, badder knife. One of my friends in Des Moines collects these gigantic knives from Busse Combat Knives. They are all made from some ridiculous steel called INFI. You can't just go to a store and buy one of these. If you are lucky and click fast enough, you might be able to order one before the million other people trying get it first. I was lucky enough to order a Busse Badger. It is about the right size for me to carry on a hike and use as a general purpose knife. The only drawback is that you have to wait 3 or 4 months to get your knife and then it doesn't come with a sheath. I ordered a custom left-handed sheath for my knife as well. I'm not sure when that stuff will come.

I read that Busse would be exhibiting and selling knives at the machine gun shoot so I decided to stop by.
The guys at the booth were actually the guys who make and sell the knives. They were so approachable and nice it was unbelievable. They had a lot of knives for sale but I didn't buy one.

I really liked the small knife at the tip of the arrow above.

Now for the guns. Yes they are automatic machine guns. Yes you can rent one to shoot it. Yes you can buy one if you want and take it home. Enjoy the rest of the photos!