I always try to eat delicious food. Unfortunately I don't have that much money, so I have to cook a lot of it at home. But thats OK because I love cooking and I love eating at home with my wife. This is a website with my favorite recipes and a little bit of commentary.

Tuesday, January 31, 2006

NY PIZZA PART 6 - THE SUMMARY

I decided to post a quick and dirty summary of my NY pizza recipe and methods. The individual posts describe in detail why I do each step.

NY PIZZA PART 1
NY PIZZA PART 2
NY PIZZA PART 3
NY PIZZA PART 4
NY PIZZA PART 5

Dough Recipe for 1 12 inch pizza
Gold Medal Bread Flour 194 grams
Sea Salt 4.3 grams
Red Star instant yeast 1.5 grams
Kansas City tap water 122 grams

Preparing the Dough
1) Take a bowl and put tap water in it. Next float a bunch of ice in the water and let it sit until it cools down. Measure out 122 grams of the ice cold water and put it into the mixer.
2) Measure out 100 grams of Gold Medal Bread Flour and put it into the water.
3) Using the paddle attachment, stir the mixture at the lowest speed for 2 minutes.
4) Immediately cover the bowl with plastic wrap and place it in the refrigerator for 20 minutes.
5) Meanwhile combine 4.3 grams of sea salt with the remaining 94 grams of flour and 1.5 grams of yeast.
6) After the 20 minute rest, slowly add the yeast/salt/flour mixture to the autolysed dough, stirring with a spoon. When the ingredients are well combined, transfer to the kneeding surface. In my case I use a well floured couche. You used to be able to by these through the Baker's Catalogue, but I wasn't able to find one on their site.
7) Kneed dough until it is smooth, satiny and elastic. Time will vary but should be fairly short because you took the trouble to include an autolyse step.
8) Form the dough into a ball and place it into an oiled container. Mist the top of the dough with spray oil to prevent a crust. Cover the bowl tightly with plastic wrap and place in the refrigerator for 72 hours.
9) 2 hours before you are ready to bake the pizza, remove the bowl from the fridge. Carefully transfer the dough to the counter (in my case to a floured couche on the counter. Do not squeeze the dough as you do not want to disturb the delicate bubbles which have formed. Cover with plastic wrap and allow to warm for 2 hours. The dough temperature should be about 60 degrees by that time.

Preparing the Oven
1) Place a baking stone on the lowest rack in the oven.
2) Place another baking stone (or some unglazed quarry tiles) on a rack 3 notches above the first. Notches vary from oven to oven so shoot for 7.5 inches.
3) Turn the oven to the highest possible heat and preheat for 1 hour.
4) While the oven is preheating you will hear the gas turn off. When this happens open the door until the gas kicks back on.

Sauce

I start with fresh Roma tomatoes. The DOC specifies that they have to be San Marzano, but unfortunately I don't live in Naples so I can't get fresh San Marzano tomatoes, only canned. A couple years ago I grew a strain of tomato in my garden called Super San Marzano. They were amazing. I canned a bunch of them up but they are all gone now. When I can't get vine ripened garden fresh tomatoes I settle on vine ripened store bought roma tomatoes. If you can't get vine ripened, oh well, you'll just have to make do with regular plum/roma tomatoes. Let them sit on the counter for a few days ripening.

To process my tomatoes I preheat the broiler. I take the tomatoes and wash them and put them on a cookie sheet. I then broil the tomatoes under the broiler for a few minutes, turning occasionally, so that the skin blackens a bit on all sides. There are usually a few spots of skin that stay red. After the tomatoes cool, I peel most of the blackened skin off, leaving a little behind. Then I run the tomatoes through a food mill to grind them into a thick chunky sauce.

The next part of my sauce making involves a little tasting to get the flavor right. If I used 4 plum tomatoes, I add a teaspoon of sea salt to the ground tomatoes along with 1/4 t freshly ground black pepper and 1/4 t very finely ground fennel seed. After stirring for a while, you have to taste the sauce. The flavor that you will be adjusting for will be the saltiness. BE VERY CAREFUL. You don't want the salt to be too overpowering. Add just a little at a time. 4 plum tomatoes makes more than enough sauce for a 12 inch pizza. You can serve the remainder as a dipping sauce for crusts.

Cheeses
I am going to use 2 cheeses for my pizza. I am going to put down a layer of low-moisture part skim mozzarella. I am planning on using the store brand at the Kansas City Hen House Grocery stores - Best Choice. That is the cheese I use for my deep dish and I have had some success with it on thin crust as well. I like it because it has a lower moisture content than Kraft.

The other cheese I will be using is fresh buffalo mozzarella. There is a little Italian grocer in Kansas City that I get mine from. It has worked out very well in the past on pizza Margherita. I usually put a few slices, about 1/8th to 1/4 inch thick, on top of the shredded mozzarella.

Assembly

1) Carefully press the dough down once, without degassing the dough, to a diameter somewhere around 6 to 8 inches.
2) Dip your hands, including the backs of your hands and knuckles in flour and lift 1 piece of dough by getting under it with a pastry scraper. Very gently lay the dough across your fists and carefully stretch it by bouncing the dough in a circular motion on your hands, carefully giving it a stretch with each bounce. If it begins to stick to your hands, lay it down on the floured counter and reflour your hands, then continue shaping it.
3)Once the shaping is done, place the dough on a floured pizza peel.
4) To top, put down a thin layer of sauce. NOT TOO MUCH. Then I put down a thin (by deep dish standards) layer of shredded mozzarella. Next I put a few thin slices of fresh buffalo mozzarella. Next put down some pepperoni and sprinkle with some freshly cut basil. To finish the pizza sprinkle the top with a small amount of sea salt. The last thing to do prior to placing on the baking stone is to swirl a little olive oil over the top circling from the center outward.

Baking
Slide the pizza from the peel directly onto the baking stone. Let it cook about 3 minutes and then slide the pizza peel back under the pizza to turn it 180 degrees. Close the door and let the pizza finish cooking.

Just Prior to Serving
Brush the outer rim of the crust with just a touch of olive oil.

NY PIZZA PART 5

Now I will talk about assembling the pizza. This is another of the very important and controversial steps in creating a good pizza. The guys over at have been experimenting for years trying to figure out the optimal way to assemble a pizza. The first step in assembling the pizza is shaping the dough. You must be very careful in this step, because you can screw up your pizza bigtime. I use a method very similar to the one described in The Bread Baker's Apprentice. To quote:

"Dip your hands, including the backs of your hands and knuckles in flour and lift 1 piece of dough by getting under it with a pastry scraper. Very gently lay the dough across your fists and carefully stretch it by bouncing the dough in a circular motion on your hands, carefully giving it a stretch with each bounce. If it begins to stick to your hands, lay it down on the floured counter and reflour your hands, then continue shaping it."


I don't toss the dough up in the air. It scares me. I do an additional step prior to the dipping and stretching. I carefully press the dough down once, without degassing the dough, to a diameter somewhere around 6 to 8 inches. Once my shaping is done I place the dough on a floured pizza peel.

To top, I put down a thin layer of sauce. NOT TOO MUCH. Then I put down a thin (by deep dish standards) layer of shredded mozzarella. Next I put a few thin slices of fresh buffalo mozzarella. Next I put down some pepperoni and sprinkle with some freshly cut basil. To finish the pizza I sprinkle the top with a small amount of sea salt. The last thing I do prior to placing on the baking stone is to swirl a little olive oil over the top circling from the center outward. I started doing the olive oil and salt steps after reading the book Pizza Napoletana. I have no idea whether any New York pizzerias do those 2 steps, I just prefer the way pizza taste that has been made this way.

To bake I slide the pizza from the peel directly onto the baking stone. I let it cook about 3 minutes and then slide the pizza peel back under the pizza to turn it 180 degrees. I close the door and let the pizza finish cooking. When the pizza is done you will know it because it will look like this:


The crust is browned but not burnt and the cheese is starting to bubble and brown. Baking times vary from oven to oven. You just have to watch it.

Prior to serving the dough, I brush the outer rim of the crust with just a touch of olive oil. Again, this idea came from the book Pizza Napoletana. I don't know if any NY pizzerias brush the crust, I just really like the way it turns out if you do.

NY PIZZA PART 4

In this post I will talk about the ingredients that I will use to make my pizza. I will start from the bottom up.

Sauce

I really like the way fresh tomatoes taste on a pizza. There are a lot of ways to go about making sauce, and in the end it is a personal preference thing. Some people are content to take a can of tomato sauce and spice it up a bit. Other people, like this guy, make extremely involved sauces. Mine is somewhere in between.

I start with fresh Roma tomatoes. The DOC specifies that they have to be San Marzano, but unfortunately I don't live in Naples so I can't get fresh San Marzano tomatoes, only canned. A couple years ago I grew a strain of tomato in my garden called Super San Marzano. They were amazing. I canned a bunch of them up but they are all gone now. When I can't get vine ripened garden fresh tomatoes I settle on vine ripened store bought roma tomatoes. If you can't get vine ripened, oh well, you'll just have to make do with regular plum/roma tomatoes. Let them sit on the counter for a few days ripening.

To process my tomatoes I preheat the broiler. I take the tomatoes and wash them and put them on a cookie sheet. I then broil the tomatoes under the broiler for a few minutes, turning occasionally, so that the skin blackens a bit on all sides. There are usually a few spots of skin that stay red. After the tomatoes cool, I peel most of the blackened skin off, leaving a little behind. Then I run the tomatoes through a food mill to grind them into a thick chunky sauce.

The next part of my sauce making involves a little tasting to get the flavor right. If I used 4 plum tomatoes, I add a teaspoon of sea salt to the ground tomatoes along with 1/4 t freshly ground black pepper and 1/4 t very finely ground fennel seed. After stirring for a while, you have to taste the sauce. The flavor that you will be adjusting for will be the saltiness. BE VERY CAREFUL. You don't want the salt to be too overpowering. Add just a little at a time. 4 plum tomatoes makes more than enough sauce for a 12 inch pizza. You can serve the remainder as a dipping sauce for crusts.

Cheeses

I am going to use 2 cheeses for my pizza. I am going to put down a layer of low-moisture part skim mozzarella. I am planning on using the store brand at the Kansas City Hen House Grocery stores - Best Choice. That is the cheese I use for my deep dish and I have had some success with it on thin crust as well. I like it because it has a lower moisture content than Kraft.

The other cheese I will be using is fresh buffalo mozzarella. There is a little Italian grocer in Kansas City that I get mine from. It has worked out very well in the past on pizza Margherita. I usually put a few slices, about 1/8th to 1/4 inch thick, on top of the shredded mozzarella.

Pepperoni

Yeah Yeah. I know that the DOC doesn't say anything about pepperoni on pizza Napoletana. I don't care. I like pepperoni pizza. There are very many different kinds of pepperoni, and everyone has their own personal favorite. To avoid offending people any more than I absolutely have to I am not even going to name my favorite brand. Suffice it to say that it is readily available.

Fresh Basil

Fresh Basil is available pretty much year round in the produce section of most grocery stores. When I make my 12 inch pizza I will take a few leaves and chop them up and put them over the top of everything.

In part 5 I will talk about assembling and baking the pizza.

NY PIZZA PART 3

Now it is time to talk about the oven. Let me just start by saying that I am pining away for a wood burning pizza oven.


Notice that I said pining away, meaning I don't have one. There is an excellent discussion of how to build a correctly proportioned wood burning pizza oven in this thread at pizzamaking.com. Why do I want a wood fired pizza oven? Because the DOC specifies that the pizza must be cooked on the floor of one at 750 - 800 degrees. You can cook a pizza in about a minute at that temperature. If you can't imagine the difference between a wood fired pizza and one that is cooked at home at 550 then I won't explain it to you.

You can approximate the conditions in a wood fired oven at home. The most noticeable difference in the taste of the pizza will probably be the lack of a smoky flavor.

How I have done this in the past is to put a rack in the lowest possible position and put a baking stone on it. Mine is from The Baker's Catalogue. It is nice and thick and weighs about 13 pounds. One key difference between a wood fired oven and my oven at home is that the ceiling is much lower in a true Napoletana oven. To recreate the low ceiling I have been putting another pizza stone on a rack about 3 notches above the first. In my oven 3 notches is about 7.5 inches. My digital camera broke so I will have to wait to post pictures of this arrangement until I get my film developed.

The next important step in preparing the oven is to preheat the oven at the highest possible temp for 1 hour. My oven goes to 550. The guys over at pizzamaking.com have a trick to get the temperature of the stone higher than 550 degrees. They preheat the oven until they hear the gas shut off. Then they open the door of the oven until they hear the gas turn back on. Because the stone will cool slower than the air in the oven, the stone will stay hot, but the air will cool, allowing the burner to kick on and put more heat into the stone. I will try that trick when I am preheating my oven to make my pizza.

Summary of preparing the oven

1) Place a baking stone on the lowest rack in the oven.
2) Place another baking stone (or some unglazed quarry tiles) on a rack 3 notches above the first. Notches vary from oven to oven so shoot for 7.5 inches.
3) Turn the oven to the highest possible heat and preheat for 1 hour.
4) While the oven is preheating you will hear the gas turn off. When this happens open the door until the gas kicks back on. I plan to do this only once during the preheating and I will report my results later.

NY PIZZA PART 2

Now that I have laid out the dough recipe, it is time to start the hard part. Good pizza is probably 94.3% technique and 6.7% recipe. (I arrived at those numbers after very precise calculations, don't even question them.) Working out the processing of the dough is where the really hard and controversial work comes in. The guys over at pizzamaking.com have been experimenting for years to get the optimal dough processing method. Some of what they have come up with is based on good experimentation and some of it is just BS. 2 things that they have come up with are very valid from my experience. Page through their glossary for kicks. The first is the concept of the autolyse. According to their site, autolyse is defined as:

"A rest period, typically lasting 15–45 minutes, during which flour and especially the protein in the flour fully absorb the water before the yeast and salt are added and fermentation activity begins. Full absorption allows the gluten structure to form better, more complex bonds and serves to reduce oxidation of the dough and shorten the overall mix time. Autolyse also helps increase the extensibility of the dough due to the action of protease enzymes in the flour to break down the gluten slightly during the autolyse. Over time, the term "autolyse" has come to be used to refer to almost any rest period during the mix/knead cycle even though such use is not technically an autolyse as conceived by its originator, Prof. Raymond Calvel, a professor emeritus of baking sciences at L'ecole Francais de Meunerie and author of the classic work on European breadmaking, LeGout de Pain. The term autolyse is pronounced ah-toh-leez."


I first came across this concept when I was learning to make bread from my favorite bread book The Bread Baker's Apprentice, by Peter Reinhart. He discusses the autolyse process on page 58.

"One of the techniques that bakers often use to minimize mixing (and thus reduce oxidation that causes natural bleaching of the flour) is to mix the flour and water for only 4 minutes, enough time to hydrate the flour fully, and then let the dough rest for 20 minutes. During this resting, or what the French call the autolyse, the protein molecules complete their hydration and begin bonding on their own. Then, when the mixing resumes and the other ingredients are added, it takes only 2 to 4 additional minutes to complete the mixing process, during which the newly formed gluten molecules continue to bond to one another in more complex ways."


When I first got serious about making thin crust pizza I bought the book Pizza Napoletana. The book describes in detail the DOC and how to translate the document's contents into Pizza Napoletana at home. The DOC specifies that the dough must be 'mixed at least 30 minutes.' I think the author of Pizza Napoletana has mistaken that guideline to mean that the dough should be kneeded for 30 minutes. Initially I was making my thin crust pizzas by kneeding them in the Kitchenaid for 30 minutes, exactly as Pizza Napoletana recommends. I made some great tasting pizzas using that method, but I have slowly realized that less kneeding can actually make better dough. For my NY style pizza, I will incorporate an autolyse step. Exactly how to do that is the subject of much debate over at pizzamaking.com. What I will do is put the water in the bottom of the mixing bowl and stir in 3/4 of the flour. I plan to stir it with the paddle attachment on the lowest speed for 2 minutes. Then I'll cover the bowl with plastic wrap and let it sit for 20 minutes before adding the rest of the ingredients. The guys over at pizzamaking.com have all kinds of theories about adding the salt separately etc. I honestly don't think it will make much difference so I am not going to bother. I then plan to hand-kneed the dough until it forms a nice satin look with a smooth surface and a nice elastic feel. My kneed time will be different from yours but I will report the kneed time anyway.

The next concept that the pizzamaking.com guys have right is cold fermentation. According to their site, cold fermentation is defined as:

The fermentation of a dough under refrigeration, usually for an extended period of time, for the purpose of developing better flavors and aromas in the finished crust through increased production of fermentation byproducts.


The first time I came across this concept was in the book The Bread Baker's Apprentice, by Peter Reinhart. He describes the technique in detail for his recipe Pain A L'Ancienne, which is the single best bread of any kind I have ever eaten. On page 191 he says:

"The technique by which this bread is made has tremendous implications for the baking industry and for both professional and home bakers. The unique delayed-fermentation method, which depends on ice-cold water, releases flavors trapped in flour in a way different from the more traditional twelve stage method. The final product has a natural sweetness and nutlike character that is distinct from breads made with exactly the same ingredients but fermented by the standard method, even with large percentages of pre-ferment."


His recipe calls for using ice cold water. I will use ice cold Kansas City tap water with an autolyse step. To make sure that the water stays ice cold I will have to put the covered dough container in the fridge while it sits for 20 minutes. Then I will continue with processing the dough. After the dough has the right look about it I will transfer it to an oiled bowl and mist the top of the dough with spray oil to prevent it from forming a hard crust.

At this stage in the dough processing, the guys over at pizzamaking.com debate how long it should sit in the fridge. Peter Reinhart recommends from 24 to 72 hours. Some of the guys at the site say you should let it stay in there for 5 days. I can't wait 5 days for pizza. I will let it sit in the fridge for 3 days.

After 72 hours, Peter Reinhart says to sit the bowl on the counter and let it warm up to room temp for 2 to 3 hours. The guys over at pizzamaking.com say that you should let the dough sit on a floured counter and cover it with plastic wrap for 2 hours, until the dough temperature is about 60 degrees. I suspect that either of these methods would work just fine, but I will go with the pizzamaking.com method. After letting the dough sit for 1 hour on the counter it will be time to prepare the oven. More on the oven and baking in the next post.

SUMMARY OF DOUGH PROCESSING FOR MY PIZZA

1) Take a bowl and put tap water in it. Next float a bunch of ice in the water and let it sit until it cools down. Measure out 122 grams of the ice cold water and put it into the mixer.
2) Measure out 100 grams of Gold Medal Bread Flour and put it into the water.
3) Using the paddle attachment, stir the mixture at the lowest speed for 2 minutes.
4) Immediately cover the bowl with plastic wrap and place it in the refrigerator for 20 minutes.
5) Meanwhile combine 4.3 grams of sea salt with the remaining 94 grams of flour and 1.5 grams of yeast.
6) After the 20 minute rest, slowly add the yeast/salt/flour mixture to the autolysed dough, stirring with a spoon. When the ingredients are well combined, transfer to the kneeding surface. In my case I use a well floured couche. You used to be able to by these through the Baker's Catalogue, but I wasn't able to find one on their site.
7) Kneed dough until it is smooth, satiny and elastic. Time will vary but should be fairly short because you took the trouble to include an autolyse step.
8) Form the dough into a ball and place it into an oiled container. Mist the top of the dough with spray oil to prevent a crust. Cover the bowl tightly with plastic wrap and place in the refrigerator for 72 hours.
9) 2 hours before you are ready to bake the pizza, remove the bowl from the fridge. Carefully transfer the dough to the counter (in my case to a floured couche on the counter. Do not squeeze the dough as you do not want to disturb the delicate bubbles which have formed. Cover with plastic wrap and allow to warm for 2 hours. The dough temperature should be about 60 degrees by that time.
10) An hour before you are ready to bake your pizza, prepare the oven. See NY PIZZA PART 3.

Monday, January 30, 2006

The Journey Begins - NY PIZZA PART 1

The first part of making my NY style pizza is research. To begin, I must define what it is I am looking for in my pizza. When you say 'NY style pizza' you are using a very nebulous term. It can mean anything from the individual slices served at Ray's (located on almost every corner) to the artisan pizzas served at famous pizzerias. If you ask a New Yorker what the best pizza is he will probably tell you about the neighborhood pizza place. You run into the same problem when you try to define 'Chicago Style Deep dish.' There is a deep dish pizza place on every corner and everyone from Chicago has a different idea of what constitutes the perfect pie.

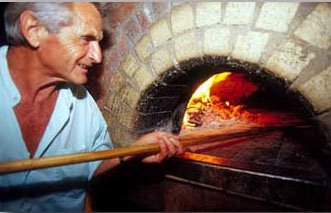
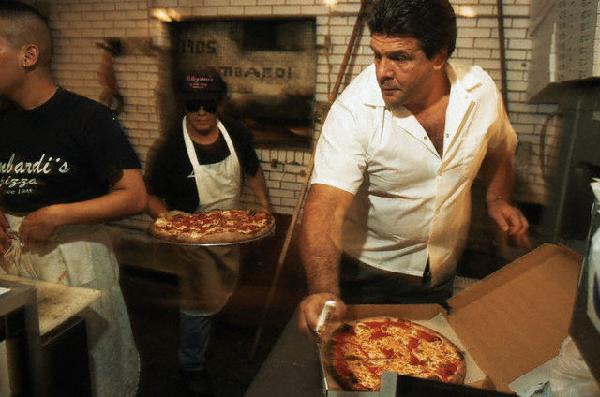
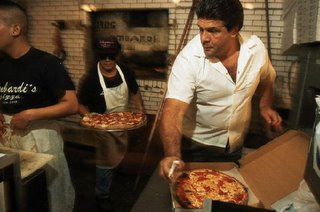
I started by looking into the history of NY pizza. The first pizzeria in New York was opened by Gennaro Lombardi in 1905. You can still get pizza at Lombardi's today.

Lombardi's makes pizza in a coal fired oven.


Since Gennaro Lombardi was from Naples, I must assume that his recipe is very similar to Pizza Napoletana. Lombardi's Pizza looks a lot to me like pizza Margherita.


Pizza Napoletana is pizza made according to the traditional methods used to make pizza in Italy. Luckily I didn't have to go to a great deal of work to figure out exactly what that is. There is a book on the subject called Pizza Napoletana.

I have made many of the pizzas out of Pizza Napoletana and they were amazing. If you read the book, you will learn all about the history of Pizza Napoletana, including the fact that in 1998 the Italian government decided to define it precisely. An organization was formed by a bunch of Naples pizza makers in the mid 1990's called Associazione Vera Pizza Napoletana to defend the integrity of their product. The VPN came up with a set of standards based on the work of Carlo Mangoni, a professor at the Second University of Naples. He made a 42 page document that outlined the historical roots of pizza and did studies on the processes and ingredients used by 40 Neapolitan pizza makers. The book Pizza Napoletana has a very in-depth presentation of the research. In Italy there is an organization that is dedicated to preserving the identity of various Italian cultural treasures. It is called the Ente Nazionale Italiano di Unificazione (UNI). UNI established a Denominazione di Origine Controllata (document of controlled origin) or DOC that defined exactly what pizza Neapolitan is. The DOC defines 2 classic pizzas, pizza marinara and pizza Margherita. The VPN publishes a recipe on its webpage for pizza Margherita.

You can do a lot more research on the subject of DOC pizza by reading the original 42 page document or by getting the book Pizza Napoletana if you are lazy like me.

I have decided to make my New York style pizza as a derivation DOC pizza. I want a pizza that has a bottom that is a little leathery, with an outer rim that is light, airy and with different sized bubbles. My NY pizza will have 2 different kinds of mozzarella - low-moisture part skim and fresh mozzarella. I really like the way pizzas made with the 2 cheeses look. I also plan to depart from pizza Margherita by the addition of pepperoni.

The guys over at pizzamaking.com have been experimenting for years with NY style pizza. I'll include some of their innovations when I make my pizza. Some of their methods are a little bit Rube Goldberg-ish for my tastes, but interesting none the less. This post is an example of what I mean. Look at the lengths this guy goes to just to make the sauce!!! Good GRAVY Batman! I know I get a little crazy with things like BBQ, schawarma and barbacoa but baking your sliced salted grape tomatoes at 150 for an hour and then 10 minutes at 200 is taking it so much farther that I am speechless. I will try to use techniques that the guys at pizzamaking.com have developed that I think are based on reason and not so much on personal bias. I understand that cooking and recipes have important personal and cultural ramifications. A lot of what you prefer in your food comes from past experiences and your own cultural identity. Some people won't cook anything that isn't made with organic ingredients. For me, whether the ingredients are organic or not doesn't make any difference. I don't carry the whole 'organic only' baggage around and I can not detect a difference in the taste so I am not going to bother with it. As another example, there is a big difference between iodinated table salt and sea salt. But if you get sea salt from France or sea salt from Sicily, it is the same salt. Its the same ocean and the ocean has a relatively constant makeup everywhere around the earth. I know that what I just pointed out would be sacrilege to anyone from either France or Sicily but I am going to try to deal with truth and I don't care if they can't.

Now I need to talk about ingredients. The DOC says that you have to use Italian 00 flour. The VPN specifically recommends Caputo flour. I have absolutely know way of obtaining Caputo flour. That is OK because I am not going to try making DOC pizza. Here is where the guys at pizzamaking.com come in handy. They have tried lots of different flours, and the consensus seems to be that the best flour to use is King Arthur Sir Lancelot flour. It is a very high gluten (protein) bread flour, with 14.2% protein. Another similar, but lower protein content flour is Gold Medal Bread flour. I can't get KASL. I have to play the cards I have been dealt. For my pizza I will use Gold Medal Bread flour.

The DOC also specifies that sea salt is to be used in making the dough. I always use sea salt anyway, so that will be the salt that I use. The DOC specifies Brewer's Yeast. I will vary at this point, as I prefer using Red Star instant yeast. I am used to using that yeast and I know how it will behave under the various conditions in my kitchen.

The DOC has regulations for tomatoes. The tomatoes can be either fresh or canned. It is OK to use canned tomatoes when fresh tomatoes aren't available. The tomatoes have to be one of the three following varieties: San Marzano, Corbara or Carbarini. The tomatoes are to be drained and chopped and placed directly on the dough. I will depart from the DOC on this point. I will include my pizza sauce recipe later.

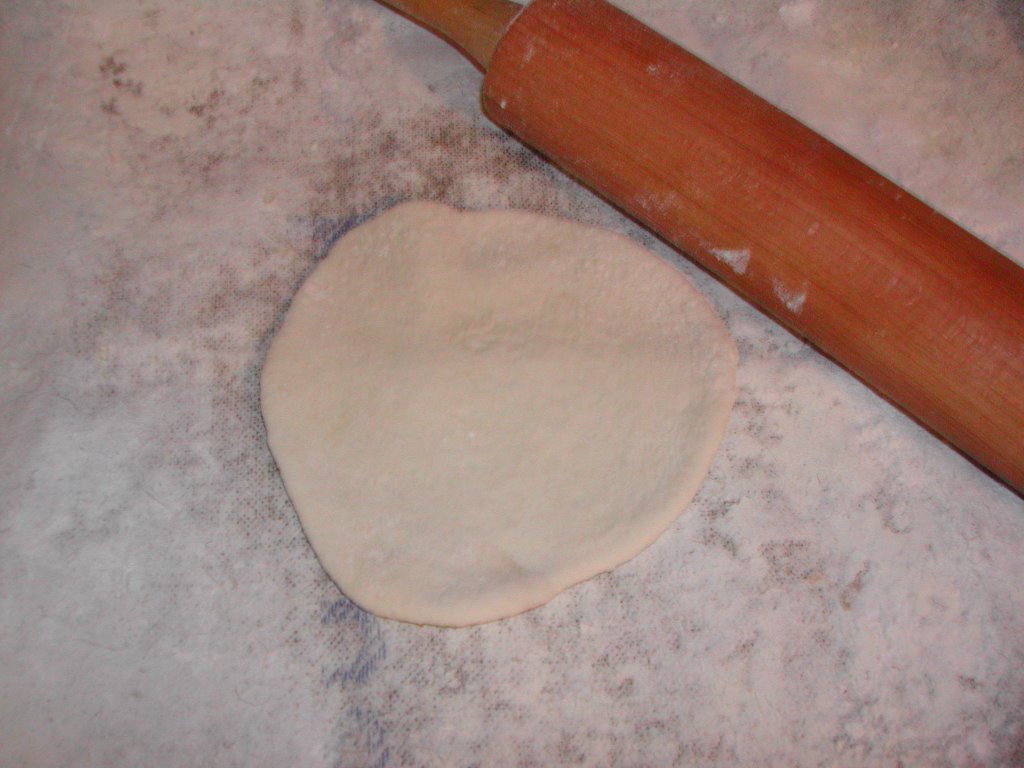
The DOC specifies that the pizzas not be over 12 inches in diameter. Most NY pizza I have eaten in NYC has been of the 16 inch + variety. My pizza peel will not accommodate a pizza over 12 inches, so I am going to stick with the DOC guidelines for my dough.

Water content and water type is another touchy subject. The ocean doesn't vary that much from region to region in the world, but fresh water sources vary hugely. The best tap water I have ever had was in Chicago - personal bias. Where you are getting your water from probably will make a difference in the taste of your pizza and the rising characteristics of the yeast. For instance, the pH of tap water varies widely from city to city. pH has a huge effect on how yeast grows. Other things like mineral content also make a difference in how yeast grow and how your dough will taste. For NY style pizza, you should probably use NY City water. Unfortunately it would be way too much trouble for me to get it, so I am going to use Kansas City tap water. As far as water content goes, the guys over at pizzamaking.com consider Tom Lehmann's New York Style Pizza recipe to be 'the authentic' NY style dough recipe. You can see the original recipe for Tom Lehmann's New York Style Pizza by clicking the link. The number that the pizzamaking.com guys have arrived at as the perfect water content is 63%. I decided to go with the results of their experimentation when choosing the water content of my dough. I will dial up the water content of my dough until I get the desired results. From my experience, if you want different sized bubbles, you want high water content. The problem comes when you try to form a high water content dough into a pizza. What I plan to do is adjust the water content upwards until I can no longer work the dough. I will depart from Tom Lehmann's recipe in the fact that I will not use oil in my dough.

An example of the formulas derived by the guys at pizzamaking.com:

Flour 100%
Salt 1.75%
Olive Oil 1.0%
Yeast 0.75%
water 63%

The VPN recipe follows the formula:

00 flour 100%
water 58.8%
salt 2.5%
brewer's yeast 1.25%

As you can see, the salt content is higher in DOC pizza and the water content is lower. The pizzamaking.com guys have also modified the recipes to use less yeast. I first came across this idea when I was learning to make bread from My favorite book on bread, The Bread Baker's Apprentice, by Peter Reinhart. He uses an even lower yeast content but uses a higher water content. Here is Peter Reinhart's formula for Pizza Napoletana:

High-gluten flour 100%
Salt 2.2%
Instant Yeast .54%
Oil 9.9%
Water 69.1%

The formula I will use for my first dough is:

High-Gluten Flour 100%
Sea Salt 2.25%
Instant Yeast 0.75%
Water 63%

How To Use Baker's Formulas (and why you should)

I first learned to use baker's formulas when I was learning to bake bread. My favorite book on bread, The Bread Baker's Apprentice, has a very good description of how to use the formulas and why you should do so.

For one thing, my cup of flour is not the same as your cup of flour. If I dip into a bag and take out a cup of flour, it will have one weight. If you do it, you will have another weight. If you make your recipes by volume instead of weight you might be able to reproduce the results but someone else might not. Another thing that cooking with weight and baker's formulas allows is scaling of recipes. You can take the DOC recipe above and make enough for 500 pizzas or enough for 1 pizza. The dough will be the same. If you tried to scale recipes using cups of flour, every time you took a cup you would be compounding the error further. Baker's formulas enable you to keep track of very small changes in your recipes over time so that you can vary one ingredient at a time and make note of the result. Enough said. I bake using weights and baker's formulas. Here is an example of how to do it, and several formulas you will need.

1) Total Flour Weight = 100%
2) Total percent is the percentage of all ingredients added up and is always >100%. and is expressed as a ratio of 1. For example 164% = 1.64.
3) Ingredient weight = ingredient % X total flour weight.
4) Total flour weight = total weight divided by total percent.

Lets work through an example. Take the formula for classic French bread and scale it to 10 pounds of dough.

Classic French Bread
100% flour
60% water
2% salt
2% yeast

The total percent of that recipe is 164% (100 + 60 + 2 + 2) and expressed as a ratio of 1 it is 1.64. So if you want 10 pounds of dough, your total weight is 10 pounds.

TFW = TW/TP = 10 lbs / 1.64 = 6.097 pounds of flour. Now that we know the TFW we can calculate the weights of all of the other ingredients. I find it a lot easier to work in grams instead of ounces so I will convert 6.097 pounds to grams. 6.097 lbs X 16 oz/pound X 28.5 grams/ounce = 2780.2 grams.

Now we will calculate the water content. Ingredient weight = ingredient % X total flour weight. Again, ingredient % is expressed as a ratio of 1.

water weight = 0.6 X 2780.2 grams = 1668.1 grams or 1.668 liters of water.

Salt weight = 0.02 X 2780.2 grams = 55 grams of salt

yeast weight = 0.02 X 2780.2 grams = 55 grams of yeast.

So using the bakers formula, we have scaled the recipe for classic French bread to make 10 pounds of dough.

2780.2 grams flour
1668.1 grams water
55 grams salt
55 grams yeast

To check your conversion, add up the weight of the ingredients. In this case the total weight = 2780.2 +1668.1 + 55 + 55 = 4558.3 grams. To be absolutely sure, you could go to the trouble of converting grams back to pounds. 4558.3 grams/ 28.5 grams/ounce = 159.9 ounces. There are 16 ounces in a pound so 159.9 oz/16 = 9.99 pounds. It doesn't add exactly up to 10 pounds because I rounded after 1 decimal place. My scale doesn't go past 1 decimal place so it doesn't make any difference if the final weight is 0.01 pounds off. My scale can't measure the difference.


The next step in applying the formula is to figure out exactly how much dough you will need to make a 12 inch pizza. My pizza peel can only accommodate a pizza of 12 inches in diameter. There is an excellent discussion of how to convert baker's formulas into pizza dough formulas here.

Briefly, to get the total weight in ounces for a specific size of pizza, the formula is:

total weight = 3.14 X R X R X thickness factor

R = radius of the pizza. For a 12 in pizza R = 6.
The thickness factor is a constant that has been worked out for various types of pizza. The guys over at pizzamaking.com have experimented and the consensus seems to be that the best thickness factor for New York Style pizza is 0.1. I will benefit from the results of their experimentation and use 0.1 as the thickness factor for my first attempt.

For my pizza I need a total weight of:

3.14 X 6 X 6 X 0.1 = 11.3 ounces or 322 grams

Calculating the recipe for my dough

I will use this formula to make my dough:
High-Gluten Flour 100%
Sea Salt 2.25%
Instant Yeast 0.75%
Water 63%

According to my calculations, the total weight of my dough needs to be 322 grams. The total percent for my formula is 100 + 2.25 + 0.75 + 63 = 166.

total flour weight = 322 grams / 1.66 = ~194 grams
salt weight = 194 grams X 0.0225 = 4.3 grams (just a touch over 3 grams)
yeast weight = 194 grams X 0.0075 = 1.5 grams (might be hard to weigh this accurately)
water weight = .63 X 194 = 122 grams

To check my math, total weight of my dough = 194 + 4.3 +1.5 + 122 = 321.8 grams. I was shooting for 322 grams, and like I said above, the difference of 0.2 grams is not measurable by my scale, so I will have to accept a little bit of error. 0.2 grams is only an error of 0.06%, and yes that number is correct. I can't measure ingredients more precisely, so I am just going to have to accept 0.06% variance in my experiments. Oh well, I'm sure I will survive.

AND NOW FINALLY AFTER ALL OF THOSE CALCULATIONS, MY DOUGH RECIPE


Gold Medal Bread Flour 194 grams
Sea Salt 4.3 grams
Red Star instant yeast 1.5 grams
Kansas City tap water 122 grams

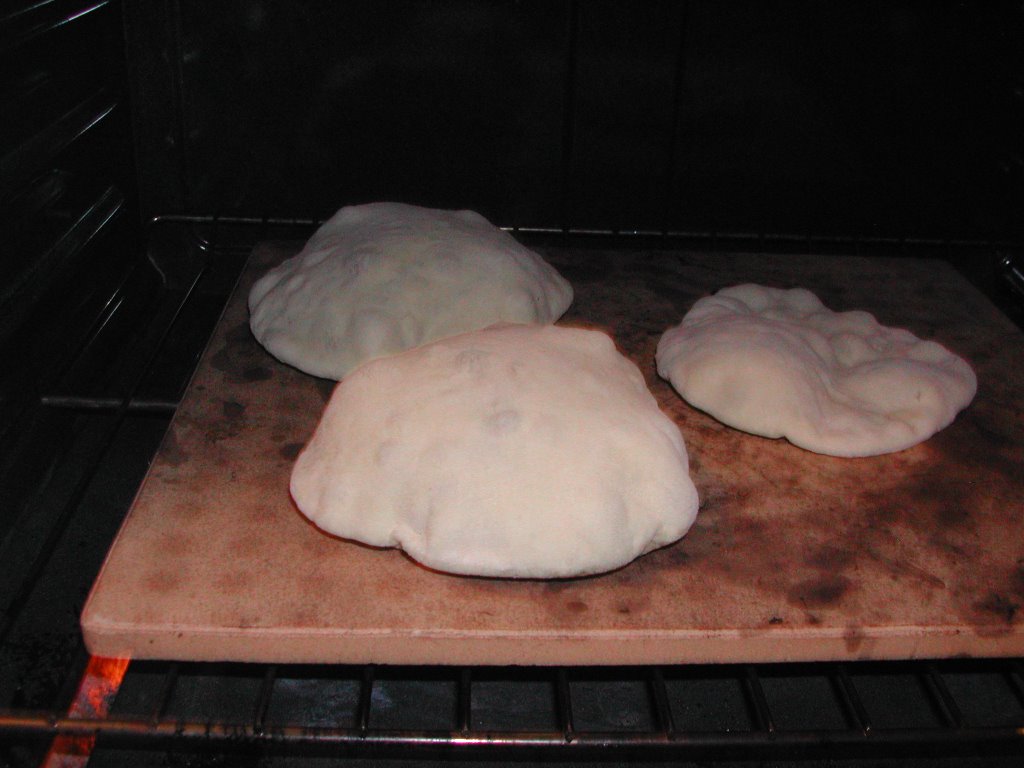
That is it for now. In my next post I will delve a little into the processing of the dough.

Sunday, January 29, 2006

Lou Malnati's Style Deep Dish Pizza Recipe

There is a pizza chain in Chicago called Lou Malnati's. It is mostly a suberb thing, so I only ate there once with my friend when we went to Naperville to play golf. The pizza is good and very similar to Uno's. I have been searching through the site Pizzamaking.com and I have been trying some of the techniques and recipes on that site. I have put together a composite recipe based on several of the recipes on that site along with some experience of my own. I think it tastes a lot like Lou Malnati's.

With this recipe its all about the technique. It is very important to follow the directions, especially as they pertain to kneed time, rise time, and baking position in the oven.

Makes enough for 1 nine inch deep dish pizza.

Dough

Combine 1/2 cup warm water with 1/2 package yeast. Stir and let the mixture sit until it is foamy. then add:

1/4 cup corn oil
1 T olive oil
1 t salt (sea salt preferred)
2 cups (8 ounces) of all purpose flour

Stir the ingredients up with a spoon until just combined, then set a timer for 2 minutes. Kneed the dough by hand for exactly 2 minutes. Once this is done, place the dough in an oiled bowl and cover with plastic wrap. Place in the fridge overnight. The next morning before you go to work put it out on the counter. It will slowly rise all day. 8-10 hours is ok or even 12. When you get home preheat the oven to 450 with the rack on the lowest rung.

Assembling pizza

Take a 12 ounce block of mozzarella cheese and cut it into slices. Next take a large can of crushed tomatoes (32 oz) and strain it for 10-15 seconds to get rid of excess juice. I prefer 6 in 1 brand tomatoes.


After straining the tomatoes, add 1 tablespoon of salt. Next take 2 T olive oil and put into the bottom of a 9 inch deep dish pizza pan. A 9 inch straight sided cake pan will work as well. Take your dough and push it into the bottom of the pan, drawing it out with your hands until flat and riding up the sides by 1 and 1/2 inch. If there is excess dough you can trim it and throw out the excess. You want the dough to be only about 1/8th to 1/4 inch thick. Some of the oil from the bottom will inevitably spill onto the top of the dough. That is just fine. Next place the slices of mozzarella in the bottom of the dough. If you have some, sprinkle a little Romano cheese over the top. Next put some pepperoni down over the cheese. Next put a little bit of cooked italian sausage over the pepperoni. Finally put a layer of sauce over the top of everything, and sprinkle with parmesan and oregano. Immediately put the pizza in the oven on the bottom rack. Cook for 15 minutes and turn. Depending on your oven you will need to cook and additional 10 to 15 minutes until done. I know mine is done when the cheese bubbles up and starts to brown. The crust will be nice and golden brown as well. Let sit for 5 minutes before slicing.

Tuesday, January 24, 2006

AWESOME new pizza site

I was fiddling around on the net today and found a great new site for pizza -

Pizzamaking.com

They have forums with in depth discussions of just about every kind of pizza known to man. There are some real pizza devotees at that site - people as crazy about pizza as I am. Anyway check it out if you are at all interested in how to make pizza at home.

Sloppy Joes

Maid-Rites are an Iowa thing. Sloppy Joes are an Iowa thing as well. If you have never eaten at a Maid-Rite shop, you are really missing out.

I think sloppy joes started during the depression when there wasn't much food around and people didn't have any money. If you wanted to feed your family you had to find a way to stretch a cheap source of protein - hamburger. Sloppy Joes are basically hamburger that has been cooked with tomato sauce and other stuff added in to stretch the meat. They have been a staple of every public school menu since their invention in the 1930's.

Maid-Rites are sloppy joes without the tomato product added. You have to eat at a Maid-rite to be able to appreciate the true glory that is a Maid-Rite. At some point I will publish the recipe that I got from a guy that actually owns a Maid-rite. It is actually very simple with few ingredients. Its all about the method.

Tonight we are having sloppy joes. The baby loves sloppy joes and we are looking to fatten her up a bit. She is at the 6th percentile for weight despite 3 months of supplementation with Ensure. Here is an easy recipe that I am sure you will love.

Sloppy Joes

1 pound hamburger
1 small (8 oz) can tomato sauce
1/2 cup Heinz Chili Sauce
1 envelope Lipton Onion Soup mix
1 T chili powder
1 T Worcestershire sauce
1 T prepared yellow mustard
a few cloves minced garlic
salt and pepper to taste
a few dashes of hot sauce - I like Louisiana Hot Sauce brand but use what you like

Brown the hamburger and garlic, but instead of using oil, use a little water in the bottom of the pan to keep the hamburger from sticking to the pan. As you are browning it, mash up the hamburger using a potato masher until it is very finely mashed. When the hamburger is browned, drain it really well. Then add the rest of the ingredients and simmer, covered, for about 15 minutes or so, stirring occasionally so that it doesn't stick to the pan. Assess the situation. If there is too much liquid then cook uncovered for a little bit. Serve on buns with optional dill hamburger slice pickles.

Ridiculous Pancakes

I have been making my pancakes a little different lately. I've taken my Great Grandmother's buttermilk pancake recipe and changed it a little. Don't get me wrong, the original recipe is still the best but every once in a while I like to change it up a bit. This recipe is truly ridiculous. It is so bad for you that I am sure this website will be taken down immediately by the fat police. In other words, don't eat these more than once a month. Seriously.

Blueberry Buttermilk Pancakes

1 cup buttermilk (with a little more to adjust consistency)
1 cup flour
1 stick unsalted butter (melted and cooled)
4 t baking powder
2 t baking soda
4 t sugar
1 t salt
2 eggs
1 cup blueberries drained of liquid

Mix everything together until well combined. Adjust consistency of the mix by adding more buttermilk if needed. Fry in a little bacon grease and enjoy.

Tuesday, January 17, 2006

GQ tacos again

I got this recipe from GQ magazine of all places. What makes it good is the homemade taco shells. This is definately one of my all-time favorite recipes.

GQ East LA Hamburger Tacos

1 pound hamburger
½ onion, diced
2 garlic cloves, minced
1 or 2 serrano chilies, diced
2 pinches mexican oregano
salt and pepper

12 corn tortillas (not the hard shells, the actual tortillas)
shredded Monterey Jack or cheddar cheese
lettuce, shredded
diced tomatoes
salsa

1) Brown hamburger. Add in onion, garlic, serrano, oregano and salt and pepper. Cook until onions soft.
2) Char tortilla on both sides over an open flame on gas stove until almost toasted. Have a frying pan full of vegetable oil sizzling. Quickly dredge both sides of the toasted tortilla in the oil, fold in half and then fry for 30 seconds. Turn it over and fry for a little longer. Drain tortillas on a paper grocery bag or a paper towel. Sprinkle with salt.


We're also making Mexican Red rice.

Real Mexican Red Rice

1 cup short grain or medium grain rice
2 cups water
1 1/2 t onion powder
1 1/2 t garlic powder
1 t salt
1/8 to 1/4 cup tomato sauce, just enough to turn the water pinkish red

Dump everything together into a sauce pan and bring to a boil. Reduce heat, cover, and simmer 10 minutes or until rice is soft. Remove from heat and let sit 5 to 10 minutes.

Actually I forgot 1 detail about the rice that I remembered when I was making it:
Put a couple tablespoons of olive oil in the bottom of the pan and heat it up. Add the rice and cook it for a little while to 'parboil' it. Some of the kernels will puff up like popcorn. I don't know if it makes a huge difference but I do it that way and it tastes EXACTLY like the rice at Mexican restaurants.

Friday, January 13, 2006

Critters Vs. Varmints

What makes an animal a critter vs. a varmint? I think varmints are critters that are a nuisance. There is also a creepy factor to varmints too. Here is my list.

Top 5 Varmints

1. Skunk
2. Weasel
3. Raccoon
4. Badger
5. Opossum


Top 5 Critters

1. Dog
2. Cat
3. Donkey
4. Pot Bellied Pig
5. Squirrel

Tuesday, January 10, 2006

News on the Barbacoa front

This just in - a good substitution for the achiote seeds is coriander. It will taste very similar. The only difference will be that the color will be a little less red.

That tip comes from Ledyard, Iowa, my adopted home town! They love to tear around town in motorcycles with side cars up there.

If you are just dying to try the recipe with achiote seeds you can get them here:

Very Naughty Achiote Seeds Sold Here

Tacos Al Pastor

The Mexican version of shawarma is Al Pastor pork.


It is cooked in a very similar way to shawarma - on a vertical rotisserie.


Guess what. You can make it on a BABY GEORGE!!!

Tacos Al Pastor

Get some dried Mexican chilis from the grocery store. For 4 pounds of pork, you need 1/2 a dozen. I used New Mexico chilis. They are red. Seed the chilis. Put 1 cup vinegar in a sauce pan. Tear up the chilis and add the pieces. Cover and bring to a boil. Reduce heat and simmer 10 minutes, adding more vinegar if necessary. When this is done, place in a blender and add:

4 cloves garlic
2 T cumin
1 T salt
2 t pepper
1 t oregano
2 T olive oil
1 clove

Blend until smooth. You will have to strain this through a sieve because the chilis will leave behind a hard husk-like skin that you will want to get rid of. Meanwhile slice your pork into thin slices. I used a 4 pound pork loin roast. Cover with the paste and marinate overnight. The next day put the pieces of pork on the rotisserie and after a few inches of pork place a ring of pineapple. You'll probably need about half a dozen rings for the whole rotisserie. Cook on the rotisserie for 1 1/2 to 2 hours. Slice off the rotisserie onto a plate. Serve with corn tortillas, fresh cilantro, diced onion and if you like them, radish slices. Taste the pork before you serve it, you will probably have to add more salt.

Digital Camera--- RIP

This is the last photo that my digital camera took before jumping out of my hands to its rather grisly and early death. A moment of silence please ...


That is what the shawarma looks like when it is cooking.

Here is a recipe for making real pocket pitas. They really do form pockets. I have proof!

Pocket Pitas

1 cup warm water
1/2 t sugar
1 package yeast

Combine those ingredients and let sit until the yeast starts to bubble. Then add:

2 1/2 cups flour
2 T olive oil

Kneed in the kitchenaid mixer. You will probably have to add more flour a tablespoon at a time. You want the dough to be moist so that it sticks to the bottom of the bowl but not to the sides when it is kneeding. Kneed for 10 minutes and then cover and let rise until doubled in size.

Meanwhile preheat your oven to 475 with a baking stone in the lowest possible position in the oven. When your dough is ready, form little balls and roll out in circles to 1/4 inch thick.


Then slap the rolled out dough pieces directly on the baking stone. They will puff up like this.


Once they have puffed up flip them over and bake for another minute at most. The whole process takes < 4 minutes. It is real important to have the dough pieces be circles. If they are odd shapes they don't puff up right.